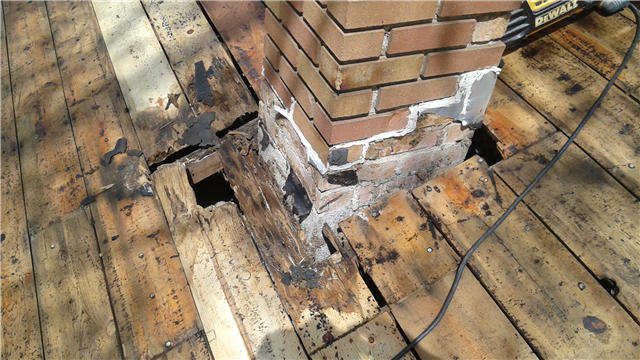
Water damage to your ceiling can be a serious problem if not addressed promptly. From structural issues to mold growth, the consequences of a water-damaged ceiling can be extensive and costly. At The Construction Group in Woodbury, Minnesota, we specialize in identifying and repairing home water damage. In this blog post, we’ll guide you through four crucial steps to effectively fix ceilings with water damage.
Step 1: Identify and Address the Source of Water
The first step in fixing a water-damaged ceiling is to identify and stop the source of the water. This is critical to prevent further damage. Common sources include roof leaks, plumbing issues, and heating appliances.
- Roof Leaks: Inspect your roof for damaged shingles, compromised flashing, or weakened seals around roof vents. Repair any issues immediately.
- Plumbing Issues: If the leak is from an upstairs bathroom, check for old caulking that may let moisture seep in. Repair any overflowing toilets or unclog sinks and drains.
- Heating Appliances: Ensure heating appliances are not leaking or causing excess moisture.
Removing the damaged drywall might be necessary to locate the source. If you need help determining where the water is coming from, hire a reputable roofing contractor like The Construction Group to inspect your roof for damage.
Step 2: Remove Damaged Material
Once the leak’s source is fixed, it’s time to remove the damaged material. This step requires careful preparation and protective gear.
- Preparation: Remove any furniture from the area and place a tarp on the floor to protect it.
- Safety Gear: Wear protective eye goggles and a face mask to safeguard against dust and debris.
- Removal: Cut out the heavily saturated sections of the ceiling. Use a utility knife to remove only the damaged areas, cutting around water stains. If needed, remove water from bulging sections by placing a bucket below. Use fans to dry the ceiling from the attic and the room below.
Step 3: Repair the Ceiling
After removing the damaged material, you can repair the ceiling. You’ll need the following tools: a taping knife, utility knife, joint compound, drywall tape, and drywall sanding sponge.
- Prepare the Surface: Use a 6-inch taping knife to remove loose ceiling texture and peeling paper.
- Install New Drywall: Cut a new section to fit the missing area. Apply adhesive and place the new drywall section.
- Apply Joint Compound: Use joint compound to fill any cracks or gaps. Reinforce with drywall tape if necessary.
- Smooth the Surface: Use a drywall sanding sponge to smooth the surface after the joint compound dries.
Step 4: Finishing Touches
After the main repair work, finish your ceiling by priming and painting it.
- Ventilation: Ensure the room is well-ventilated by opening windows.
- Paint Matching: Take a sample of the removed ceiling section to a hardware store for paint matching.
- Repaint: For a uniform look, consider repainting the entire ceiling.
Get Professional Help
While DIY projects can be rewarding, fixing a water-damaged ceiling can be complex and risky if not done correctly. To ensure the repair is thorough and long-lasting, consider hiring professionals. The Construction Group offers comprehensive water damage repair services, including roof and attic inspections, to prevent future issues.
Contact us at 651-731-5857 for a free quote or to schedule your water damage repair services. Let our licensed and insured experts help you restore your home effectively.
PHONE: 651-731-5857
Licensed & Insured: BC-331121
Following these four steps, you can effectively address and repair water damage to your ceiling, ensuring your home remains safe and sound. If you need professional assistance, The Construction Group is here to help.

